CCD
FROM THE GROUND UP
by
Ted Saker, Jr.
©
2000, 2010 Ted Saker, Jr. All Rights Reserved.
Getting
Started: Exploring the Brave New World of CCD (1998)
I
decided to make the investment in a new telescope in late 1991 or
early 1992. My ambition at the time was to discover a way to use
computers and computer technology to take deep sky images from my
backyard. I quickly discovered at the time that the equipment was
either unavailable or cost-prohibitive to obtain. I purchased a
Celestron Super Polaris C8, the Schmidt-Cassegrain OTA on a German
equatorial mount made by Vixen. I began my astrophotographical
adventures with photoemulsion planetary imaging with eyepiece
projection. As the years went by and costs came down, a variety of
cameras in many price ranges entered the marketplace.
CCD
cameras suitable for deep sky astrophotography cost anywhere from
$2,000 to $8,000. The costs are mainly related to the size and
sensitivity of the imaging chip. The current state of the art is the
Kodak KAF1600 chip used in the SBIG ST-8 camera. Cameras suitable for
planetary or other types of applications cost much less, anywhere in
the $500 to $1,500 range.
Computer
hardware is required in virtually all cases and may add extra costs.
One question must be answered: laptop or desktop? Desktop equipment
is more durable and cheaper, but if mobility is important, hauling
around a case, keyboard and monitor will quickly pall. Laptops are
much easier to transport, but are more expensive and may be less
tolerant of cold and moisture found in the field. Computer software
for camera control and image processing must also be obtained. Camera
manufacturers usually provide their own proprietary control programs;
however, there is at least one commercially available unbundled
package that claims to control the camera and process the image. It
has received a favorable review in a major astronomical magazine. The
other major question is how much processing power is needed to run
the control and image processing software. The answer to this
question can impact the costs as well.
Finally,
as with any computer based technology, unplanned obsolescence can
overtake the CCD imager. Today’s state of the art imaging rig may
well be tomorrow’s Astromart fodder.
My
Vision: Joining the CCD Revolution on a Shoestring Budget
I
wanted to obtain deep sky images from my backyard under extremely
light polluted conditions. The key was a small investment; therefore,
using the existing telescope and mount, a Celestron Super Polaris
C-8, purchased in 1992, formed the optical base for the system. It
has a good light grasp and compact design. The mount is obsolete,
having been succeeded by the Great Polaris series of German
equatorial mounts which in turn have been supplanted by the new G8
series. I also learned about the book "The CCD Camera Cookbook"
available through Willman-Bell publishing. To buy or build, that was
the question. The answer was directly related to the amount of
funding and the amount of time. The question was decided as I had
much of the latter and little of the former, plus a spirit of
adventure in abundance.
Choosing
a Camera: The Cookbook 245 (1999-2003)
I
chose to build the Cookbook 245 instead of buying a commercially
designed and manufactured model. I figured I could handle a soldering
iron and power tools. The total investment for a deep sky CCD camera
was under $500, including the chip. The diagnostic and camera control
software was provided with the book.
The
heart of the Cookbook 245 is the Texas Instruments TC 245 chip. It
has a 378 x 245 pixel array, at 19 x 25 microns per pixel. The
imaging area of the chip is only slightly smaller than the KAF-400
chip used in the SBIG ST-7 camera. The CB 245 is both liquid and
thermoelectrically cooled. The cost of the chip was around $100. Many
other electrical parts were available through local Radio Shack
stores. Some parts not carried by the store had to be ordered through
RS Unlimited. Shipping very prompt. University Optics of Ann Arbor,
Michigan, carries a kit that contains many of the harder to find
parts as well as the machined aluminum pieces for the camera head and
a peltier module for thermoelectric cooling of the chip. I scrounged
other parts from several sources. The total construction time was
approximately three and a half months of evening and weekend work.
Cookbook
Camera Quirks
Having
had no experience with CCD imaging, I found a steep learning curve
existed with learning to use the camera and software. Cooling the
chip is critical to reduce dark current and provide a clean image
free of graininess. Heat is the enemy. The CB 245's peltier module
provides thermoelectric cooling while a water/alcohol mix for the
liquid cooling system conducts the waste heat to a coil immersed in
an ice water bath. The version of the control software provided with
the book runs under MS-DOS, and even a lowly 80286 (AT) computer can
handle it. The unit is self-warranted: repairs can be performed “in
house”.
Integration
with Telescope
Finding,
focusing and placement of the object on the chip's image plane is
essential. The trick is that the image area of the TC 245 is offset
from optical axis unlike film. Focusing is especially crucial. If the
object is out of focus even the slightest bit, the camera cannot
obtain an image. Further, a time lag exists between the point when
the camera obtains an image and the point when the computer displays
the image. This download lag makes focusing on the fly difficult at
best. The real trick is coordinating the image plane and observing
plane to find and position the object on the chip. A flip mirror
system is highly recommended: I selected the Taurus
Tracker III for
finding and focusing on deep sky objects. The Tracker III has a
finding/focusing port as well as a guiding port. The parfocalization
process places the image plane of the camera at the same distance
from the flip mirror as the image plane of a high powered eyepiece.
Thus, once the focused object is placed in the proper location in the
eyepiece field of view, the camera will obtain a proper image of the
object. The Taurus III accepted my Celestron f 6.3 focal reducer to
provide a wider field of view for easier acquisition of objects and
shorter integration times. However, I soon encountered a backfocus
problem: the chip was too far to the rear of the image plane. A
member of the CAS came to my rescue by milling an aluminum adapter
that placed the camera head at the correct distance from the flip
mirror.
CCD
imaging has several advantages over photoemulsion. CCD chips are much
more sensitive than film; thus, exposure times are much shorter. In
many instances, manual guiding is not necessary. For long
integrations needed for objects having a low surface brightness,
autoguiding is a real advantage. The CB245 is adaptable for
autoguiding. Unfortunately, however, my Super Polaris mount cannot
accommodate autoguiding without expensive and radical modifications.
One supplier suggested buying a new telescope if I wanted autoguiding
and/or "go to" capability.
Even
with the advantage of working with a CCD chip instead of photographic
film, the problem of finding dimmer objects in lower than less than
ideal conditions still posed a serious problem. "Go to"
capability would solve much of the problem since a computer can
position the telescope more accurately than a person can using
setting circles or by star-hopping. Once again, the obsolescence of
the Super Polaris mount caused a problem. It is not designed for
encoders that are needed to communicate positional angles to the
computer, nor has any after market manufacturer saw fit to design,
manufacture or market variable speed motors for the SP mount to slew
to objects and track them.
After
reading an article on the "computer-telescope interface" in
a major astronomical magazine in early 1999, I surmised it might be
possible to modify the SP mount for use with a computerized star
atlas, but it would never be a true "go to" mount. The best
I could hope for was to install a computer-telescope interface that
would in essence turn the telescope into a computer mouse with the
direction it points at displayed as a large cross-hairs on the
computer's monitor. I selected Brian Kidwell's Deep Space
Navigator for the computer-telescope interface and David
Chandler's Deep Space computer program for the star atlas. I
would have to manually slew the telescope to the correct position,
then find, focus and guide. This system has proven to be reliable and
cost-effective even if it isn't the latest and greatest.
Imaging
and Image Processing
Knowing
how CCDs work is necessary. Film uses photographic grains, CCD chips
have picture elements, known as pixels. Pixels are far more sensitive
than grains; however, both suffer from the effects of limiting
magnitudes imposed by light pollution that limit integration or
exposure lengths. Non anti-blooming gate (NABG) CCD chips generally
suffer from "blooming", the appearance of bright streaks
when the camera is pointed at a bright object, usually a star.
Anti-blooming gate (ABG) chips, like the KAF 1600L chip (more on that
below) are designed to eliminate blooming at the cost of reduced
sensitivity.
The
astrophotographer who uses film is enslaved to the photodeveloper
unless he has his own darkroom. The developer has an enormous amount
of discretion in the color balancing of the image. Many of the films
in use today give the night sky a greenish hue unless the developer
takes great care during the development process. If the
astrophotographer desires to post the images on the internet, the
images have to be scanned as well. Scanning offers some advantages.
If the negative is scanned instead of the print, the
astrophotographer can balance the colors using a computer program
that normally comes with the scanner, thereby avoiding the tyranny of
the developer. Also, there's the time the developer requires for
developing the negatives, plus the costs. All that nickel and diming
adds up over time.
The
CCD camera downloads the image directly to the computer with no
"middleman". Shooting dark frames is absolutely required in
order for the image processing software to cancel out the "dark
noise" present in every image. A dark frame is an image taken
with the camera covered. The concern I had was that the CB 245 format
is proprietary. None of the commercially available packages I am
aware of support that format. Luckily, one of the designers of the CB
245 wrote software that converts the CB 245 format to a standard FTS
file, allowing further processing of the image with other
commercially available packages. It also has a very excellent ability
to subtract the dark frame from the image, yielding an image that is
much higher in real data, lower in noise and is easier to process.
Light
pollution tends to affect CCD cameras less than photoemulsion (PE).
However, the chip is not immune from the effects of light pollution.
Light pollution will wash out an image if the integration time is too
long. A CCD image may be viewed immediately after acquisition in
sharp contrast to PE. Unless you have your own darkroom, PE requires
a trip to the developer, a wait for the pictures, paying for the
development and a dependence on the technician for proper color
balance. Unless one knows a developer who is willing to spend time to
color balance the image correctly, the print will not display the
image accurately.
On
the other hand, CCD images are mainly limited to viewing on a
computer screen unless one owns a high resolution printer. Also,
quality of the image display is dependent upon the resolution of the
monitor.
Decisions,
Decisions
Whether
or not to invest in a CCD imaging system depends on whether a person
is an astrophotographer or an observer. Is CCD really necessary? The
answer is a definite yes if one lives in the city and has any
ambition of imaging deep sky objects. Photographic film is still
viable if the deep sky object is fairly large and bright, like the
Great Orion Nebula, but it just won't cut it with other objects
having lower surface brightnesses.
Buying
a camera carries certain pros and cons. The pros: the buyer gets a
company backing the hardware and software with warranty guarantees;
if one's budget allows, state of the art is within reach, and many
manufacturers work with software developers to provide seamless
programs. The cons: in the event of defects or breakage, the buyer
can lose the camera for a long time if repairs necessary; the cost of
buying a camera suitable for deep sky work increases depending on the
chip and the bells and whistles built in. In other words, the cash
investment increases the closer one gets to state of the art. As
newer technologies enter the market, today's state of the art may
become obsolete rather quickly.
Building
a camera likewise brings pros and cons to the table. The pros: one
knows the design and hence, can repair it. I once had to perform a
quick field repair on the camera head. One can minimize the amount of
cash invested while enjoying all the advantages of learning how to
conduct CCD imaging. The experience of building a camera can also
increase one's knowledge of electronics that can be applied in other
projects. The cons: It's not state of the art in hardware or
software. It can be challenging and frustrating to gather everything
necessary to make the whole rig work.
Recommendations
Build
the Cookbook 245 if budget is a major factor and/or one has the
skills and perseverance to complete a project.
Follow
the book’ s instructions and one can hardly go wrong.
If
one runs into the unexpected, the designer and co-author will answer
questions if one asks really nicely.
If
one buys a camera, the more one spends, the more one gets. LX200 and
ST7 or above owners have the advantage of hardware and software
vendors building and writing products especially for that format.
In
particular, autoguiders, adaptive optics are entering the market
specifically designed for that telescope model.
Whether
one builds or buys, the CCD revolution is within reach for any
astrophotographer.
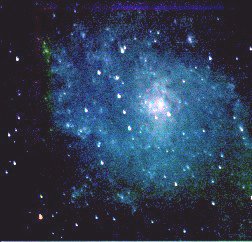
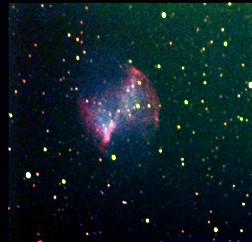
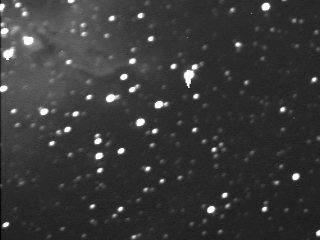
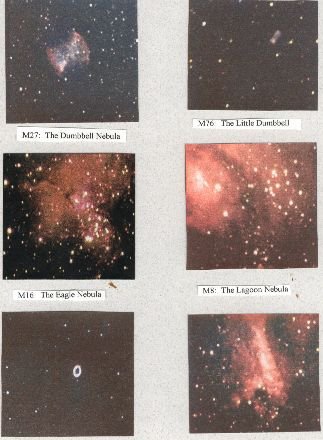
Some
images taken with the Cookbook 245 camera (dates and exposure data
has been misplaced):
|
|
|
|
|
M
33 “The Pinwheel” c. 2000
|
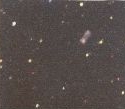
M
27 “The Dumbbell” 8/28/2000
|
M
27 from a scanned photoemulsion print taken July, 1998
|
|
|

|
|
|
m76_cb245.jpg
|
M
16 “The Eagle” color 8/18/2000
|
M
76 “Little Dumbbell” color, summer 2000
|
|
|
|

|
|
A
composite of tricolor images taken with the Cookbook camera. The
missing captions (L to R) are for M 57 (The Ring Nebula) and M
17 (The Swan Nebula)
|
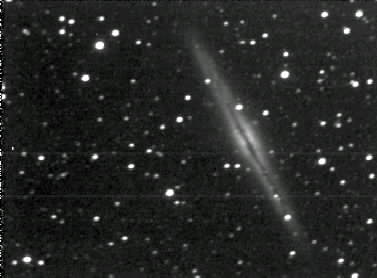
NGC
891 mono taken at OTSP 2001 after installation of Cookbook low
dark current mod
|
M
81 “Bode's Nebula” mono OTSP 2001 after installation of
Cookbook low dark current mod
|
Epilogue:
September 15, 2010
This
is the eve of my older son's 18th
birthday. This story began shortly before he was born and much has
happened since the day I first took delivery of my SP-C8. CCD cameras
have come a long way since the original SBIG ST-4.
In
summary, I learned that imaging from sites in and around a major city
is a difficult undertaking through much trial and error (mostly
error). Emulsion photography is pretty much limited to lunar and
planetary subjects. I imaged with the Cookbook successfully through
early 2002 when the opportunity
to purchase the Genesis 16 camera kit and a KAF-1600 ABG chip. That
chip was the same one used in the first generation ST-8 that was the
flagship camera model of the Santa Barbara Instruments Group.
The
Genesis camera saw first light at the 2003 Texas Star Party. I imaged
with it for three years, but never really achieved the results I had
hoped for. Once again, progress intervened. Technical support for the
Genesis camera ended in 2004 as prices for comparable commercial
cameras continued to plummet. By the time the Genesis camera died at
the 2005 Texas Star Party, commercially built CCD cameras had come
down so far in price that I could afford a commercial model which had
been very, very pricey only a few short years before. The march of
technology sent the self-built camera market into extinction.
I
was not ready to give up on the Genesis camera because although the
imaging chip was obsolete, it was still serviceable. A consultant
friend of mine who had previously owned a Genesis camera and was
familiar with its architecture attempted to revive mine. After some
months of work, the Genesis camera was still not ready, so I had to
press the Cookbook back into service for the 2006 Winter Star Party.
Unfortunately, it suffered some kind of tropical meltdown. It's
currently sitting on a shelf awaiting a rebuild. Later that spring,
my friend offered to purchase the camera and I used the proceeds to
purchase my first commercially built camera, a previously owned ST-8
that was equipped with the same class and vintage sensor I used in
the Genesis camera. The ST-8 saw first light at the 2006 Texas Star
Party.
The
generally unsatisfactory results I obtained from ABG chips I used
from 2002 to 2008 led me to believe that the greater sensitivity of
NABG chips would yield better signal to noise ratio (SNR). The most
challenging aspect of urban CCD imaging is obtaining a high enough
SNR in the face of severe to extreme light pollution. ABG chips are
less sensitive than NABG chips, and the difference affects the
ability to obtain a good SN ratio especially in tricolor imaging. One
thing I suspect but haven't yet been able to prove is that the NABG
chip is superior to the ABG chip. Comparing the Cookbook's NABG chip
to the Genesis and ST-8's ABG chips, the Cookbook camera's chip
yielded better SNR in my opinion. I thought that the Cookbook's TC
245 chip with its larger pixels and lack of a blooming gate may have
been the reason for the better results. Time and experience bore this
out in part.
Nonetheless,
SNR is and always will be the key to good results. Thousands of low
pressure sodium exterior light fixtures create a decidedly greenish
background that makes image processing difficult. Obtaining a good,
black background and a proper representation of the object is still a
significant challenge. The problem isn't limited to tricolor imaging,
either. It's very similar to the problem with emulsion photography:
light pollution would “fog” the film out before getting a decent
image. CCD cameras yield better results than photo emulsion, but
could be still better if people turned out a few lights. Even though
my goal was to conduct monochrome and tricolor imaging from my urban
home, I soon learned that the quality of the image and ease of
processing still depends enormously on a dark sky site.
In
order to test my theories regarding ABG vs. NABG chips, in early
July, 2008, I sold the ST-8 (ABG) camera and acquired an SBIG ST-8E
(NABG) camera. It was equipped with the Kodak KAF-1602E, the second
generation of the 1600 series sensor. I put my chief theory to the
test: whether the NABG chip is superior to its ABG predecessors. The
comparison gallery shows the difference in the images obtained with
both types of sensors. The second generation chip in the 8E was more
sensitive in the blue spectrum than its predecessor.
In
the summer of 2010, I sold the 8E and acquired the third generation
SBIG ST-8XME. Instead of the parallel port interface I had been
working with up until now, the 8XME has a USB interface. The extra
bonus is the ability to utilize SBIG's proprietary I2C port which
enables the user to control the CFW without separate interface and
power cables. Coupled with the replacement of the heavier parallel
cable with the lighter USB cable, the wiring harness is much lighter.
Losing the extra weight of the cables reduces the load on the OTA,
thereby making autoguiding easier. I believe this is reflected in the
recent images I acquired with the new imaging rig.
In
researching imaging processing techniques led me to adjust how I
acquire images with the camera. I believe that these techniques and a
NABG chip have led to a vast improvement in the quality of my images.
All of the imaging gear I use now is commercially designed and
manufactured, but I do miss the challenging days of making my own
equipment and learning how to use it. The only significant challenge
I face today is effective image processing.
Back
to Ted's Astropix CCD page